Fixed PVC curtain fitting instructions
Step 1: Fitting the hanging rail
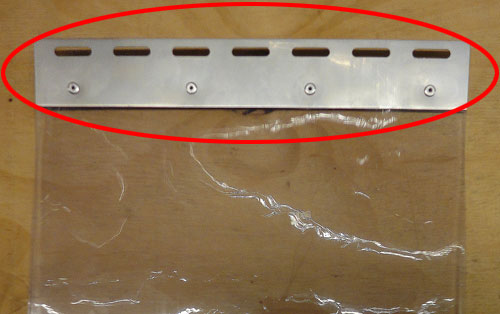
Your hook-on hanging rail will be transported to you in convenient, 1m long strips which are simply fitted end-to-end above above your doorway with the hooks hanging downwards. The PVC strips sometimes extend past the edge of the hanging rail so be sure you don't fit the rail flush against a side wall (fig 1)
The rails are pre-drilled for both wall and ceiling mounting and your curtain kit comes complete with rawl-plugs and screws for fixing into masonry or concrete. For fixing the rail to uPVC or wooden door frames, steel surrounds or RSJ's you will need to supply your own fixings. Also, you need to be sure the fixing point is solid enough to take the weight of the curtain.
Step 2: Hanging the PVC Strips
Once your rail is securely fixed in place you can start hanging the PVC Strips.
Your curtain kit will come complete with enough PVC strips to cover the width of your doorway. Each strip will have a polycarbonate or steel hanging plate attached at one end (fig 2) and will be rolled up for transportation, often with multiple strips rolled together.
You simply unroll the strips and hang them, one at a time, by their plates on the hanging rail hooks . Because the strips have been rolled for transportation they might curl up a little at the end, but they will straighten out once they have been hanging in your doorway for a while.
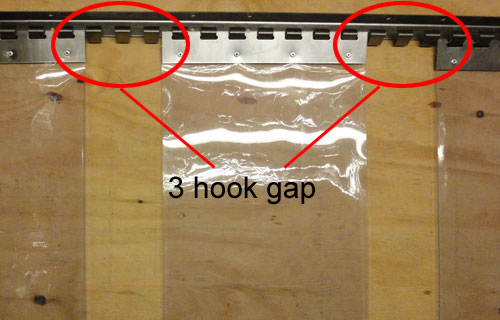
You start off by hanging a row of strips across the width of the doorway, all with the same side of the hanging plate facing out. The gap you leave between each PVC strip depends on what width of PVC you have and what type of overlap you require (fig 3).
The following table shows how many hooks you need to leave as a gap between each PVC strip on the first row.
| PVC Type | Number of hooks gap for Maximum overlap |
Number of hooks gap for Minimum overlap |
|---|---|---|
| 200mm | 1 | 3 |
| 300mm | 1 | 3 |
| 400mm | 1 | 5 |
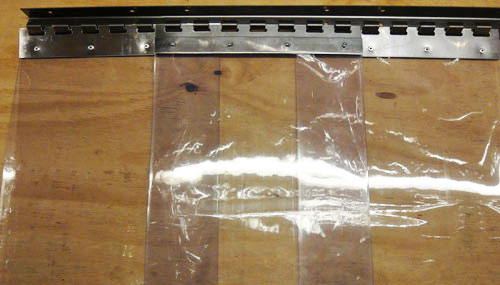
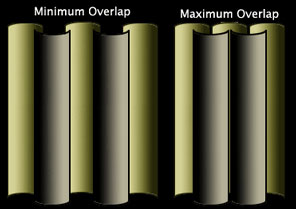
Once you have hung the first row of PVC strips with the correct spacing between each, you can then start hanging the second row on top of the first row. You must hang each of the second row of strips over the gaps on the first row (fig 4). This time however you must turn the PVC strips around so the other side of the hanging plate is facing out. This helps the strips 'interlock' because they each have a slight sectional curve (fig 5).
Once all of the PVC Strips have been fitted you simply trim each one to about 10mm above the floor with a Stanley knife.
That's all there is to it. If it's looked after correctly your new PVC curtain kit will last many trouble free years. You can take the strips down if you wish during the summer months and they can be cleaned very easily using water and a mild detergent.
Fig 1: Diagram showing hanging plate overhang 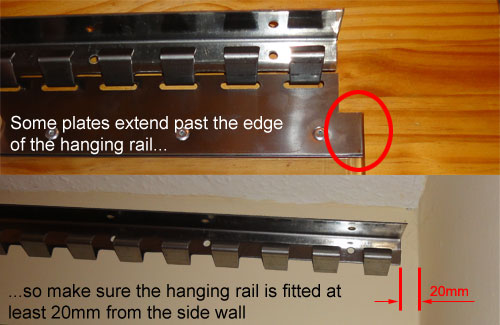 |
|---|
|
|
|
|